• Portfolio
  • Blog
  • Travel
    • Russia/Estonia
    • Istanbul
    • Hong Kong
    • India
    • Morocco
    • Thailand
    • Italy
    • Vietnam
    • Spain/Portugal
    • Egypt
    • United Arab Emirates
    • Ireland
    • Myanmar
    • Croatia
    • Mauthausen Concentration Camp
  • Headshots
  • Fine Art Prints
  • New Work
  • About
  • Instagram
  • Contact
Assignment Photography for Corporate America
  • Portfolio
  • Blog
  • Travel
    • Russia/Estonia
    • Istanbul
    • Hong Kong
    • India
    • Morocco
    • Thailand
    • Italy
    • Vietnam
    • Spain/Portugal
    • Egypt
    • United Arab Emirates
    • Ireland
    • Myanmar
    • Croatia
    • Mauthausen Concentration Camp
  • Headshots
  • Fine Art Prints
  • New Work
  • About
  • Instagram
  • Contact

Subject Driven Lighting


This photograph was taken on my recent trip to Wyoming shooting pipeline work around the Green River & Rock Springs area. Work crews cut out early on the pipeline, anywhere around 4 or 5 PM. During the summer months, this leaves plenty of good light with no workers to photograph.


Before a particular trenching crew took off for the day, I asked to have a backhoe positioned close to the string of pipe. The operator of the backhoe showed us how to turn on the lights on the rig if we wanted them on. Of course we want them on, can we also take it out for a spin?

I order to light this photograph, I placed a Nikon SB-800 in the cab of the backhoe using a Justin Clamp. I placed the strobe above the visor with the diffusion dome attached, and I fired the strobe with a PocketWizard. You can see that the strobe in the cab not only lights the interior, it also provide some nice light on Erik. I positioned the cab door open in order to allow the light to reach Erik on the ground.

Here is the first shot in this series. You will notice as I did, how lifeless the outside front of the backhoe looks without light on it. In order to put more interest in the photo, I positioned a second strobe on the outside of the backhoe to light the front of the cab.

The second strobe, another Nikon SB-800 attached to a Justin Clamp was positioned on the backside of the bucket in order to provide light to the outside of the backhoe. This strobe was also fired via PocketWizard. The diffusion dome was removed and the wide angle plastic extender was placed over the lens of the strobe.

Subject driven lighting is a believable light, one that does not draw attention to the photographers hand. I'm not going for that "Hey, look at my light" style of photography, it's more about "creating light" that's believable.

tags: Lighting
Saturday 09.06.08
Posted by David Tejada
Comments: 3
 

Seeing the Possibilities


One of the hardest thing for me when I was new to lighting, was seeing the possibilities in a location.  When I first started in photography, I was lucky to have worked with a very talented photographer in Houston, TX.  Those who followed this blog my remember me mentioning his name in the past, Joe Baraban.


When I went to work for Joe, I had never been in a studio before, seen or used strobes let alone realize that you could actually make a living taking pictures.  It would just blow my mind to watch Joe walk into a drab location and absolutely transform it using light. Joe could see the possibilities in his minds eye and creating a dramatic scene which was not immediately visible me.  Developing this kind of skill takes time, practice and hard work.   

When I arrive on location, go through a process of location assessment.  What type of lighting is existing, tungsten/daylight/other.  Do I have control over those light sources, can I use any one of those or all of those lights to my advantage?  I mentally close my eyes to the existing light and imagine the scene lit differently using my light (the one's I have with me at the time) and what other light that may exist.  The amount of equipment you have on hand surly determines how far you can transform a location with light.

When I arrive in a location or space that is larger than I can possibly light with the gear on hand,  I still think BIG however I might light SMALL.  I'm going to let the existing ambient light do the heavy lifting for me, I'm going to use what ever ambient light that available as my fill.  I can than use my lights to accent the details.

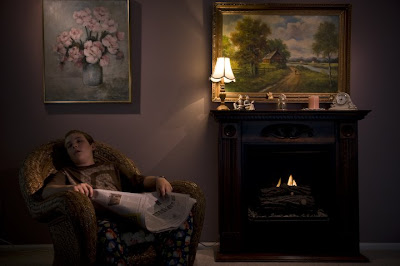
I shot the above photo this morning.  I was walking through our master bedroom and thought this would be a good exercise in lighting. I'll show you the process of building this shot with the series of photos below.

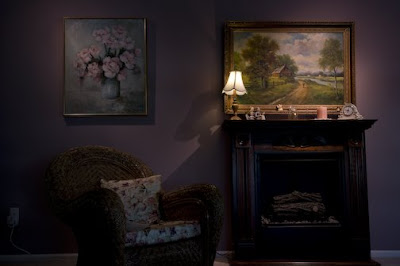
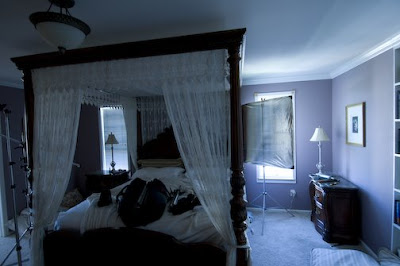
Here is how the original scene looked before starting. Bedroom entrance is to the left of the frame. We have three windows pouring in light to the room. Two of those are at camera right on either side of the bed and the other directly behind me and to my right. In this shot the camera WB was set to daylight
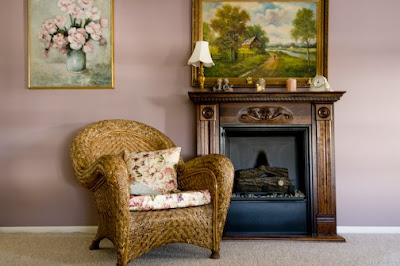
In the photo below, I've added one SB-800 strobe on a boom zoomed to the 105 setting on the head in order to light the painting on the right.  I have also fitted the head with a foam flag to prevent the light from falling forward toward the floor and lens of the camera.
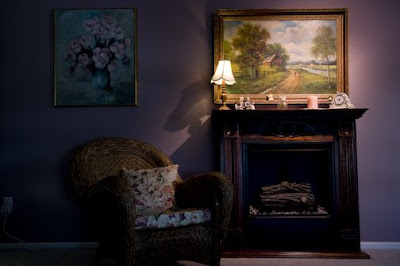
 

In this next photo, you can see that I have added another SB-800 on a boom to light the painting on the left side of the frame.  This was my first exposure with this added light and I realized that I did not put a full CTO (Color Temperature Orange) filter on the strobe. Remember that the WB on the camera is set to tungsten and any daylight (strobes) will have a cooler color temp. in the photo. 
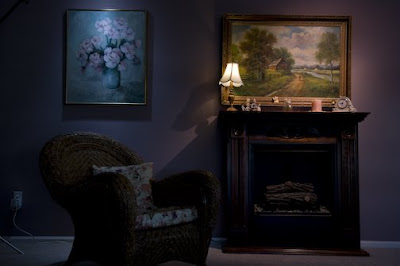
I corrected the color of the strobe by adding a full CTO to it and repositioned it to a more pleasant position on painting on the left.  The results of those changes are shown below.
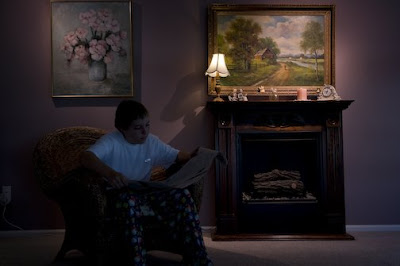
I than asked my son who was busy downstairs fighting an intense battle of Halo to sit in for a test shot.  I wanted to see what the scale of the shot would look like and how I might light a person seated in the chair.
I than grab another SB-800, put a grid on it and feathered the light just past and in front of his face.  The grid I use is one which was designed for a Novatron Snoot.  With a little gaffers tape and velco, the grid works well.  I might also add that I put a full CTO filter on this strobe as well.  The results of adding this 3rd light is shown here.
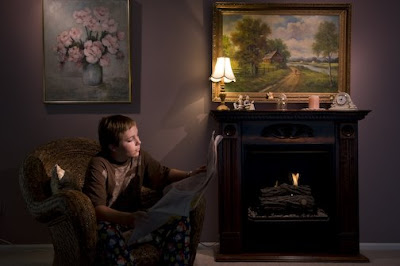
You throw a few Sterno cans in the fake fireplace and you have a real cozy environment. In short order, Chris was bored and and quickly fell asleep.  I wonder if it had anything to do to the fact that I gave him the Wall Street Journal to read?

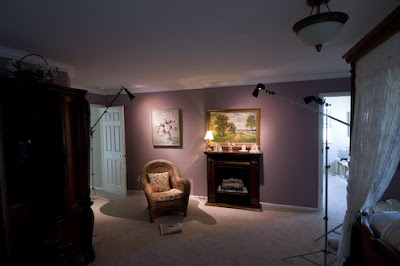
The rest of the photos show the complete set up of lights and one showing a panel at the window at the far right.  I did so because this was a new window and we have not put blinds up yet, that's on my "honey do" list.

I hope you have enjoyed this post, look around your own home and pick a spot and practice with your lights!
tags: Lighting, SB-800
Thursday 07.03.08
Posted by David Tejada
Comments: 14
 

A Simple Portrait

On the previous post, I mentioned that I was headed up to Scottsbluff, NE on assignment.  Well, in this short post I will share with you one of the portraits I shot while in Scottsbluff.  I shot over 2700 images for this client, a huge amount in my mind.  I've spent the last several days editing and burning images to disk for the client.


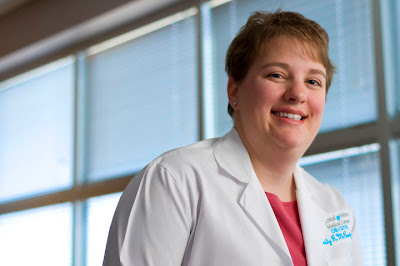
This is one of the portraits I shot for a campaign they are starting call "Call Me"  not really certain that's the name or not.  The purpose of the campaign is to recruitment new physicians to the hospital.  The headline "Call Me" adds a personal touch. In the ad, the pictured physician would provide a personal phone number so the prospective recruitment could call with questions about the hospital and life style of Scottsbluff.  It's often hard for smaller communities to recruit new doctors to the area.

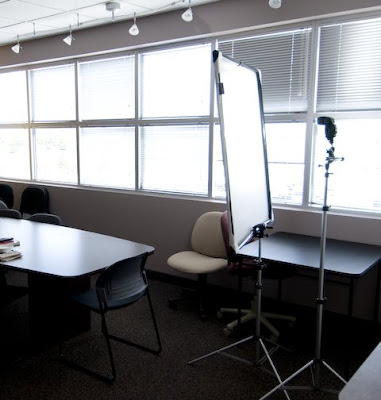
The lighting for this portrait could not have been more simple.  One SB-800 on a stand and shot through a light panel.  I have several collapsible panels from Calumet that I use for this type of work.  I fired the flash using the build-in flash or (commander) on my Nikon D300.  The photo below show you the total setup.  I used a lower angle to include the glass windows as a design element to the photo.  I place the subject to the far right of the frame, allowing the copy to be placed on the left for the ad.

The way I hold the panel in position is one of two way that I use.  In this case, I place a Bogen Super Clamp on the top of a stand, and than clamp the frame of the panel to the clamp.  Another method would be to simply place an A clamp on the top of the stand and place the frame in between the two squeeze handles of the clamp.

I may as well show you another portrait while I'm at it!  This portrait was shot with available light plus the use of a reflector for the right side of the face.  There way a building just outside the windows on the left being struck with direct sunlight which filled the hallway with this beautiful light.  I shot this wide open using my newly purchased $109.00 Nikon 50mm f 1.8 lens,  WOW.  I just love this lens.  It's small, light and very sharp and for a little more than a hundred dollars, you can't go wrong. 

I might also mention that I still have space for the August 2 and 23rd lighting workshop "Small Strobes, Big Results".  If your interested in learning more about location lighting, light and compact check it out.

tags: Assignment Work, Lighting
Thursday 06.26.08
Posted by David Tejada
Comments: 5
 

Making Time For Yourself


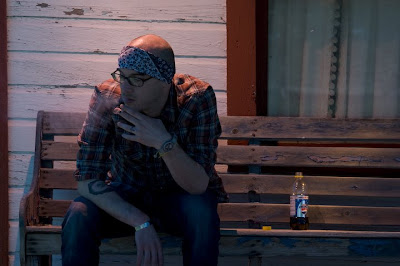
It's really important to make time for yourself to shoot and practice your craft. While heading up to Scottsbluff, NE. for an assignment to shoot some health care images for a client of mine, I decided to stop and shoot for myself. We stopped in a small town in Nebraska while driving to Scottsbluff that had this interesting porch and bench. I thought it would be fun to take 15 minutes out of your drive to make this photograph.


I thought I could use this setting to create a photograph that looked as if it had been photographed late at night. The porch was in full open shade, which allowed me to create the mood of late night. I set my camera white balance to tungsten so that I could get a slight blue bias in the shadow area's of the image that included ambient light. In this case, the ambient light would be serving as my fill light.

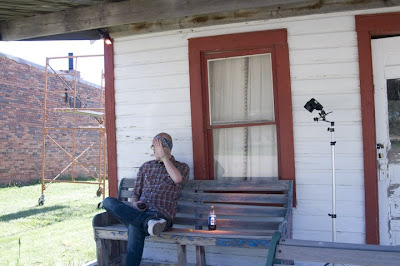
I placed a Nikon SB-800 on a Justin Clamp over the subject gelled with 2 full CTO (Color Temperature Orange) gels over the flash head. The reason for using 2 full CTO's is because if I had only used one, the light coming from the strobe would not have the warmth I wanted. One CTO would have rendered the light as appearing neutral or balanced for tungsten. By adding the second or additional CTO, I was able to achieve the warmth of a tungsten light overhead.

The second Nikon SB-800 strobe was placed on a stand and gridded to only illuminate the back of the bench and soda bottle. This strobe was also gelled with 2 full CTO gels for the reason stated above.


Here is the video we shot while making this photo. I have 17 other videos posted at YouTube that you might find interesting as well. My lighting workshop "Small Strobes, Big Results" are filling fast. I have a few more openings for the August 2nd and August 23rd workshop in Denver if your interested in attending.

tags: Lighting, Videos
Tuesday 06.24.08
Posted by David Tejada
Comments: 5
 

Urban Hunting

I had an opportunity this past weekend to photography my friend (let's call him Clay). Clay works for the sheriff's department...


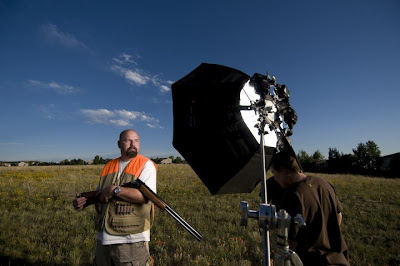
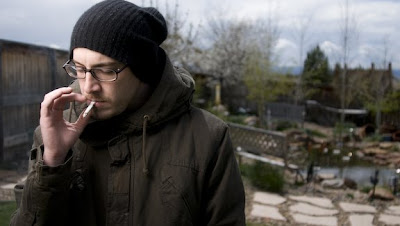
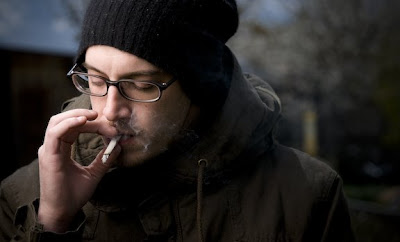
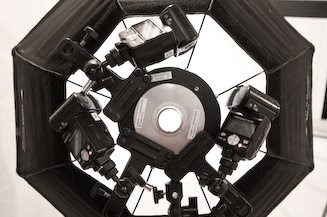
Anyway, took Clay out to the field behind my home to photography him about 20 minutes before sundown.  The set-up I used for the following photos was a small Octa-box from Amvona, these are inexpensive boxes that happen to work well.  To the outside of the box I mounted 3 SB-800's  using 3 Justin Clamps.  Here is a photo of the set up. All but the last photo shown used high speed sync, Nikon's CLS (Creative Lighting System).


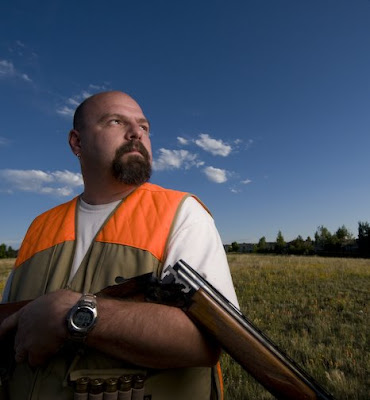
My son Chris and his friend (let's call him Billy) held a 42" Flexfill to shade Clay from direct sunlight.  The EXIF data on the photo below tell me I shot this photo at 1/3200 @ f4.0 the focal length of the lens was 12mm.

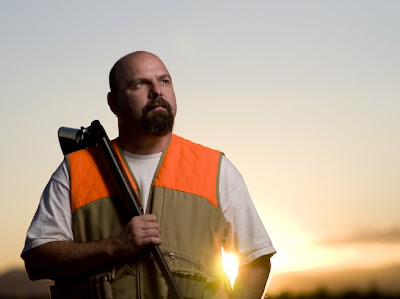
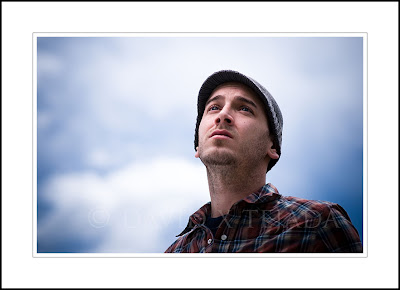
I took several shots from various positions, here I placed Clay with his back to the sun and me shooting straight into it.  I was using my 85mm f1.4 lens, shot at 1/6400 @f2.5.


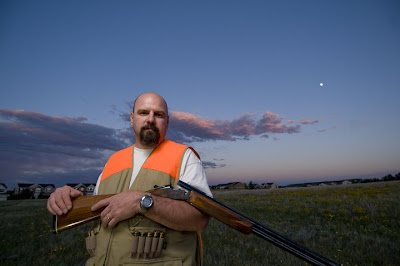
When the sun did set, we turned back facing east where the only clouds in the sky were to be found.  We even had the moon in the sky that night, shot with the 12mm-24mm lens at 12mm.  The shutter speed was 1/250 @ f 4.0.


Lighting like this is fun-fast-easy.  If you would like to learn more about lighting with small strobes, visit my workshop website "Small Strobes, Big Results".  I have two workshops in Denver this August 2008. The August 2nd workshop has 4 spots available and the August 23 rd has 5 openings. 

I want to thank many of my readers who have offered to sponsor a workshop in their hometowns.  As soon as I have the time available, I'll be contacting each of you who have offered to sponsor a workshop with more details.

tags: Lighting
Tuesday 06.17.08
Posted by David Tejada
Comments: 10
 

High Speed Sync-CLS

Ian was over today, it's wonderful to have him around to help with lighting tests. I'm pretty tired of shooting myself all the time. We shot this in my backyard using the following equipment. Octagonal soft box, (also known as an Octa Box), 3 Nikon SB-800 speedlights attached to the Octa with Justin Clamps, D300 and a 24mm - 85mm lens.

The SB's where set to remote and all where placed on the same channel and group. I shot the above photo of Ian at 1/8000 second @ f/2.8. 24mm length on the zoom. When using High Speed Sync, the flash strength really diminishes quickly as you increase your shutter speed above the normal sync speed of 1/320 sec.

At 1/8000 sec. the Octa box needed to be about 2 1/2 - 3 feet from Ian's face. As I slowed the shutter to 1/5000 sec. I needed to reduce the power on the strobes. I should mention that I was firing the strobes via in camera CLS command on the D300.

I just love the quality of light when pumped through some diffusion. I lose about a stop of light when doing so. You can see some sunlight on Ian's shoulder on the right.

It would be great if Nikon produced a larger more powerful strobe that still uses the Creative Lighting System with high speed sync. I'm sure if they did, it would cost a bundle.

If been asked to provide a photo how I fastened the strobes to the Octa box. Here is a photo of the 3 Justin clamps in place.

Here is a sample photo using my new Beauty Dish. Nice quality light but very weak when trying to use high speed sync, just not enough power.

tags: Lighting
Monday 05.12.08
Posted by David Tejada
Comments: 4
 
Newer / Older

Powered by Squarespace.