I've had a lot of comments regarding my earlier post about the ring flash I built. A lot of you wanted a step by step tutorial on how I made mine. That being said, here we go.
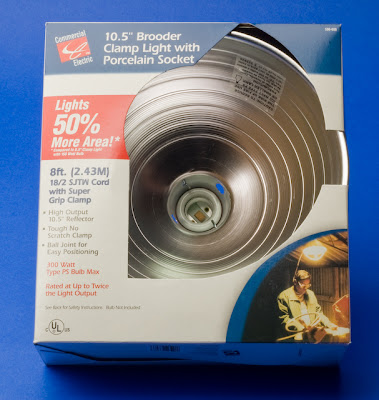
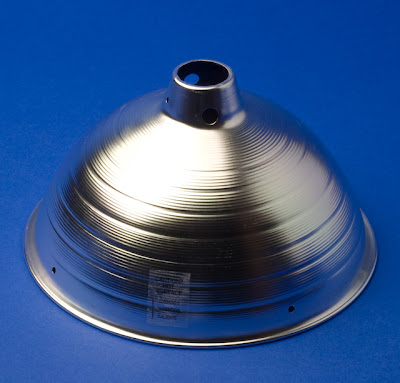
My first step was a visit to my local Home Depot store, straight to the electrical department. Here you will find a standard 10.5 inch utility light.
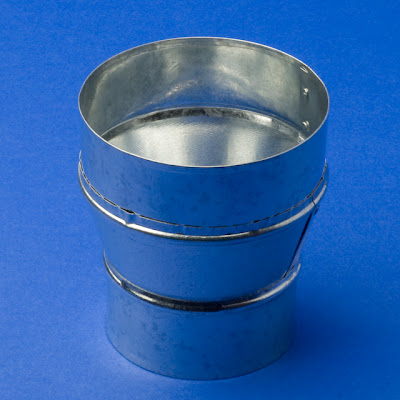
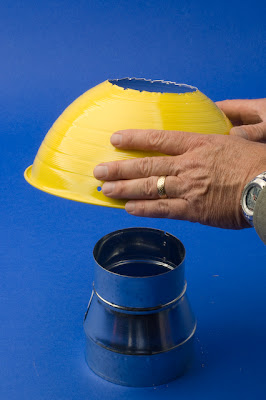
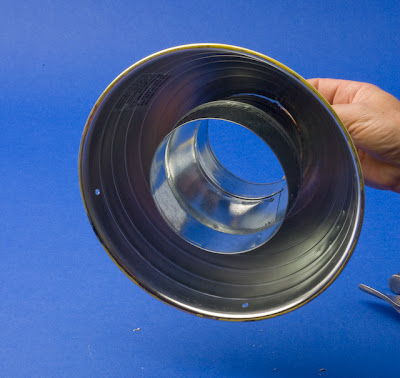
The next stop was the heating department, ventilation stuff. I found a 4" X 5" coupler for what I believe is for a furnace vent of sorts. This item is shown below.
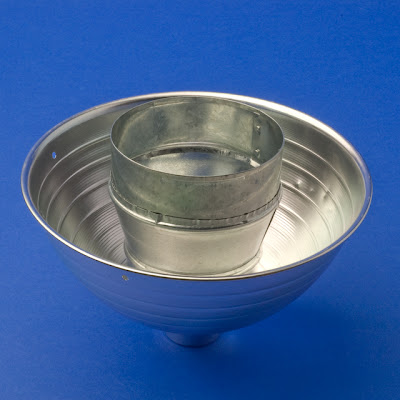
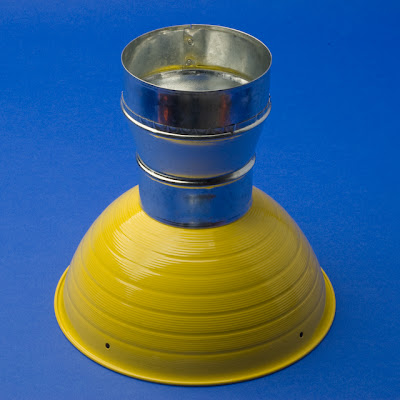
 This heating coupler is the part your camera lens will be shooting through. The smaller end of this coupler will end up coming through the top of the light dome. This photo below should give you the idea how things will be fitting together.
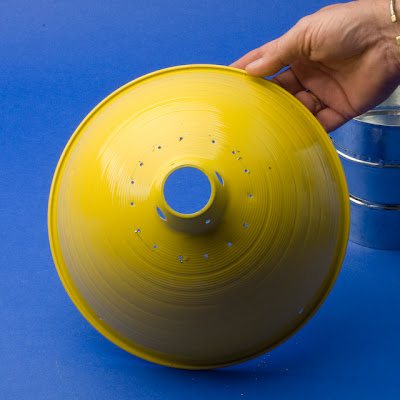
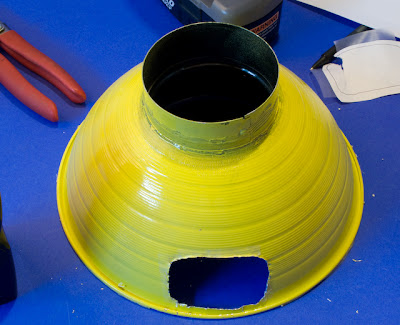
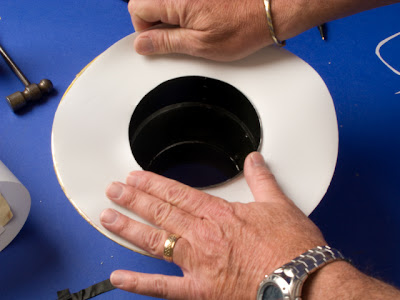
 The next step is to mark on the top of the light dome where you will be making the opening to fit the two pieces together. In this photo you can see this step. You will also notice that I have put my first coat of paint on it as well. Remember, it is the small end of the coupler I'm sizing as it is this side which will be coming through.
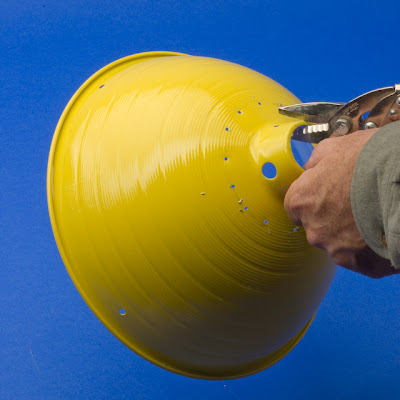
 As you can see from the photo above, I'm marking the inside diameter of the coupler. I would rather enlarge the hole later than try to make it smaller, you get the point. After marking the top of the dome, I now have a visual on where to make my cut. Before doing so, I drilled small holes around the future opening. This made it easier when I started using the tin snips to cut the opening. Here are a few more photo to show the process.
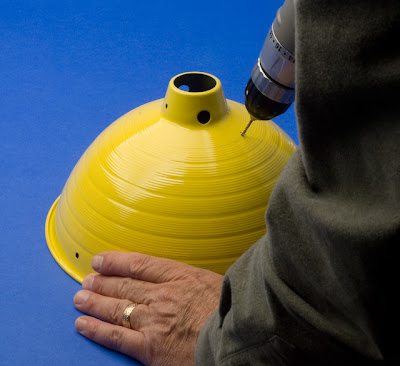
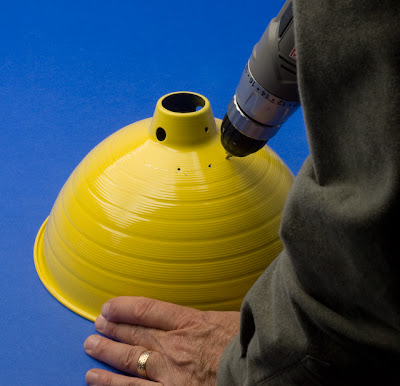
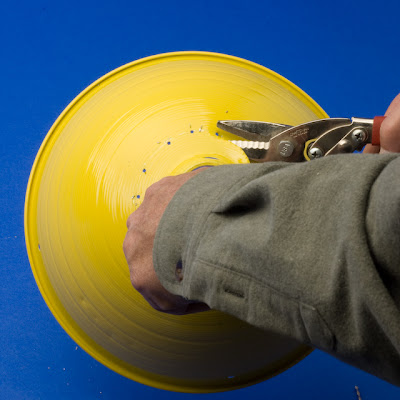
 The next step is to cut out the top part of the light dome. I use a pair of tin snips I had in my work shed. Here you can see the process.
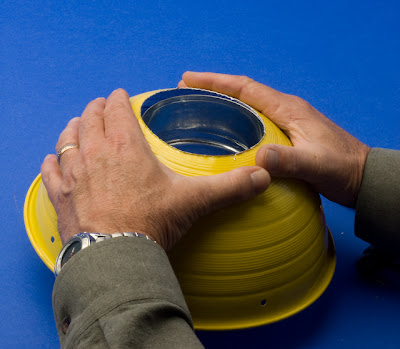
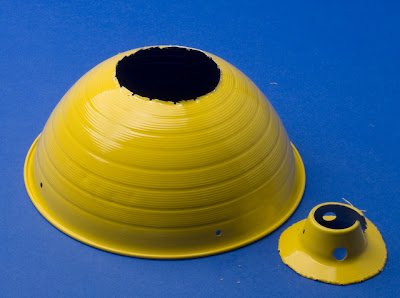 Now that I have the top off, I can fit the heating coupler through the opening. You may as I had to, cut additional portions in order to fit the coupler through. Warning. don't make this hole to large, make it just fit. Have a look here.
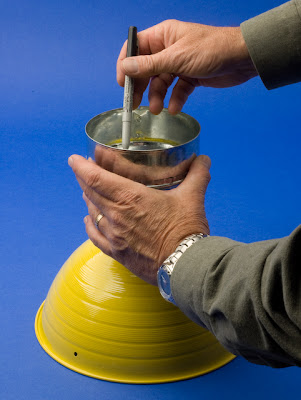
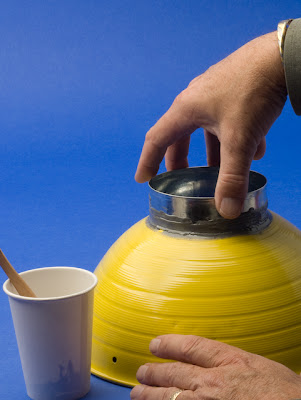
 In order to secure these two parts together, I used JB Wield. I'm sure some other epoxy would work fine. Before using JB Wield, I used a small hammer to try to close any excess metal around the coupler for a more snug fit.
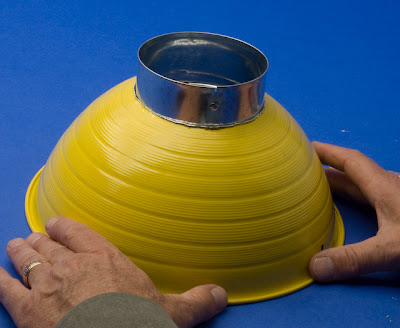
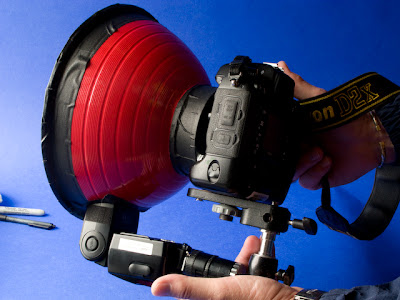
 After the epoxy has dried, your ring flash will start to resemble the final product. This is getting exciting isn't it!
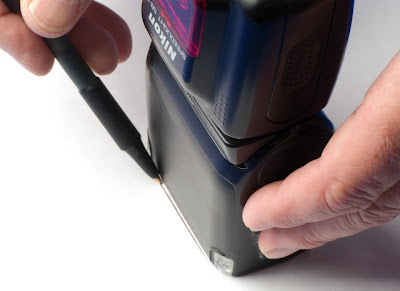
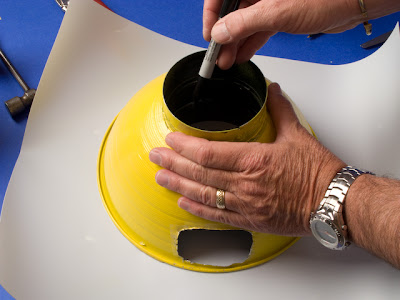
 One very nice thing about using this utility lamp is that the inside is already shinny, no tin foil or other reflective material to fashion together. Now you need to make a place for your flash to enter the ring. I've made two of these, one for a Nikon SB-800 and the other for a Nikon SB-28. The photo below is showing me making a template for my strobe.
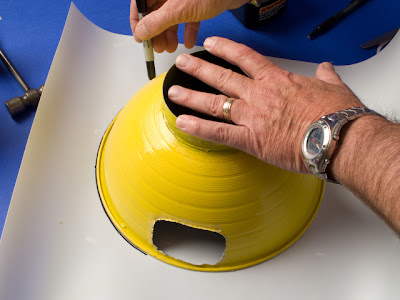
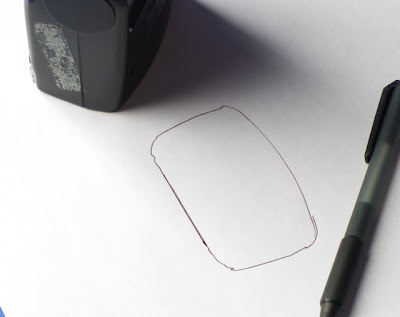 Cut out the template and place it near the forward edge of the lamp. Tape the template to the dome and began drilling hole like before. Use your tin snips to cut away the opening. After opening this hole, I hammered the rough edge and than taped it with gaffers tape.
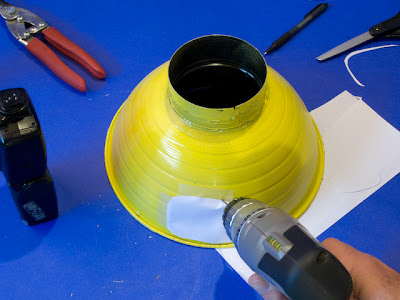
 Now we need the diffusion material for the front of the ring. I just so happened to have this material available in my studio. I used a material called, Trans-Lum from Calumet. I have visited there web site looking for this material and I can't find it. Anyway, the material you need is something thin, strong and something that will not hold back a ton of light. Here are a few photos showing this material and the fitting of it.
 On the second ring flash I made, I tried to glue the diffusion material to the front of the lamp with Gorilla Glue. This did work some what, it has a cleaner look than using the black gaffers tape on the first ring flash, your choice.
The next step is to find a way to mount the strobe and ring flash together. Here again, I had odds and ends around to fashion this rig together. I used a camera mounting plate which came with a bogen flexarm for the bottom of the camera. Shown here.
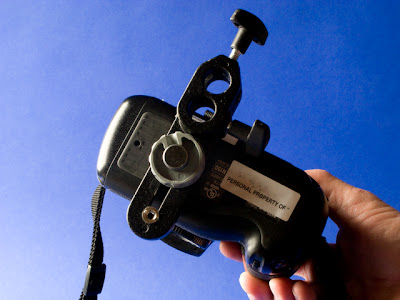 On to this I attached a mounting stud, shown here as well.
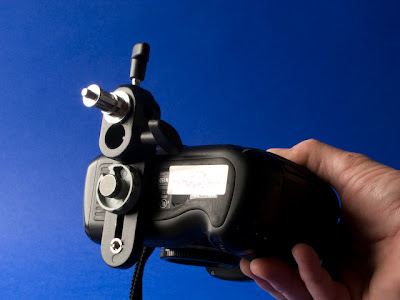 On to this, I attached a small ball head. On to this, I attached a flash shoe mount to hold the actual strobe. I used two fashioned together to give me additional length to reach the hole for the front of the strobe. I understand that most of you will not have these items laying around for your use. I would recommend using a series of L brackets to accomplish this part of the project. I have seen other mounting systems that you might be able to employ. Try looking here and come up with a solution that works for your particular flash and camera combo. I actually starting building Richard Melanson ring flash before I came up with this design.
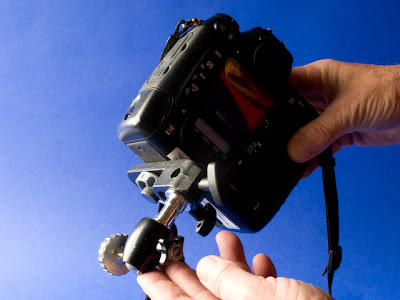
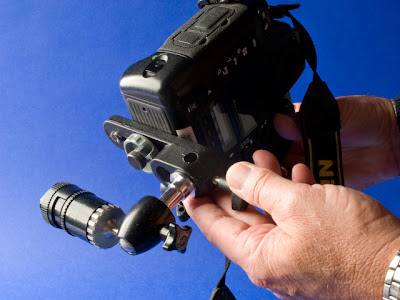
 When my flash is pushed up into the bottom opening, the back of the ring flash is tucked up under the prism housing on the camera. This system seems to work well.
I do want to point out the following points. When I hold my camera, my left hand is under the strobe and my right is not only holding the camera I am resting my index finger against the back ring. This feels very natural to me and the camera and flash ring works as a unit.
Please take a look at my other post on this ring flash, it will show you more photos and samples of the photo results. I hope this post was helpful and you have fun building your own ring flash. DT


 Seated in the theater in the production image above is Peter, one of the 4 models we had available for the students to photograph while at this location.
 To round out the shot, I used an Orbis Ring Flash for some fill. The ring flash is a wonderful tool to use when adding some fill. Here is the set up for the photo shown above.


